Supra Heater Core Replacement
Plan.
For a while now I have had to keep cleaning an oily residue off the inside of the windows of my Supra. Someone once told me this was due to a heater core leak. Sure, I was losing some coolant as I had seepage through the radiator top cap, but I didn't smell any coolant so I didn't think he was right. A few months later, sitting in a drive-thru line, I started smelling coolant very strongly. I was blowing steam out of my rightmost dash vent. Sorry for doubting you friend. Probably turns out that most of the coolant loss was due to the start of my first blown head gasket.Project.
I've never had the dash out in this car and the Service Manual isn't very specific about it. I removed the stereo, stereo and a/c cover, the center console, and from there just started digging in. For the pad, I just took out what bolts I could see and gently pulled to tell where it was still attached at. Turned out it came off without too much trouble. What a mess of tangled wires, ducting, and computer boxes it revealed though. The next item was the metal crossbar. In order to remove it I had to detach the computer modules, wiring clips, and such. Again I removed the bolts I saw and l slid it out the passenger's side of the car. I had already used a length of heater hose to bypass the heater valve and core, so the core was loose from the cooling system. With a few nuts and screws the heater core box was loose. At this stage I wasn't sure if I would have to open the a/c system or not. Most of the shops that I had talked to said yes. Well we'll just try it first. I did have to loosen the a/c box from the firewall to give myself the extra room I needed to wiggle the heater box out. Let me reiterate: the heater core will come out without breaking into the a/c system. By now it was too late to finish the job, so I screwed the shift knob back on, hooked up the gauges, wire tied them above the steering column and drove the car home. Let me tell you that was a noisy ride. I could see down out the center of the car, past the trans, and watch the road go by. The next day I took the old core out of the box and filled it with water to see exactly what was bad - the core or one of the attach lines. It started leaking right away. I guess the core itself is bad, good thing I have another. Everything went back together quickly now that I knew where everything was.Step by step how to.
Difficulty.
1- I guess that Toyota uses this core in other vehicles and made it so the pipes coming off of it are changeable depending on the application. This made it impossible to tell if my leak was in the core itself or in one of the joints without pulling the core anyway. If I was going to have to take the core out, I might as well have another just in case.I had to buy a used core without even knowing if I needed one.2- All in all, the job was fairly easy for someone with patience and good mechanical sense. It's seems more difficult than it is.
Problems.
None. Other than seeming very daunting.Payoff.
The payoff for getting rid of an item that was spewing steam into the cabin need not be told, I think. I used this repair to replace my dashpad as it had curled up above the gauges and remove an old cell phone. Here I go. This can be done at home. |
 With the dash pad off, there is quite a mess. |
 Crossbar is hanging out the door. |
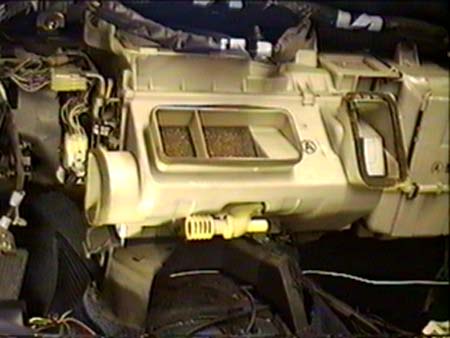 Heater box in center. |
 Heater to A/C boxes joint. |
 A/C box to blower. |
 With the stuff loose the heater box will come out. |
 See. |
 New core is on the left. |
 Pipe to core seam, possible leak point. |
 Water flows right out of the old core. |
 All finished, new dash, no more cell phone. |